Monday

Mmm-Mmm Mondays: Last Minute Strawberry Shortcake

I know I've got a winner recipe when my kids taste it and say, "Mom, you should put this on your blog!"  This super quick and easy Strawberry Shortcake was one my daughter and I thought up as a last minute dessert for our family night. 

 15-Minute Strawberry Shortcake

 1 can of large refrigerator biscuits (we used butter-flavored)
1 large box instant vanilla pudding
strawberry jam

Directions: Bake biscuits as directed on can.  Mix pudding as directed on box. Open jar of jam like your common sense tells you to. Cut each biscuit in half, then put pudding and jam on top.  Couldn't be simpler, right?


Everyone in my family loved the way this tasted, and I loved how easy it was to put together--      only 15 minutes total!!

Thursday

Friendly Feature: Super Easy Chalkboard Plate

Today I am featuring Emily from Not So Idle Hands and her oh-so-very-creative blog.  It was hard to choose a favorite project, so here is one of the highlights for me, that I am just dying to make. Don't tell anyone in my family, but I think this just solved my Christmas Gift dilemma for this year! 


Emily Says:
I got these beautiful plates on clearance from Target some time ago and knew they would be perfect! I like the way they have a wide edge around them.

You will also need:
  • Chalkboard paint
  • Primer
  • Blue tape (painters tape)


Start by taping off where you want the chalkboard area to be.....making sure to cover the rest of the plate to keep it splatter-free. See how I used the tape to make curved corners....it's easy :)

Spray a layer of primer first. This will help the paint to stick to the slick surface of the plate. Then, spray 2-4 thin layers (thin layers will keep it from getting drips) of the chalkboard paint till you are happy with the thickness. 

After you are happy, take the tape off (before it dries), just in case your painters tape pulls off the paint once it's dry.


Yay! 
Now you have something to use for your daily menu, instructions to hubby & kiddos, shopping list, etc.......


Thanks again, Emily, for sharing your project with us.  Don't forget to hop over to Not So Idle Hands to see her other creative projects!

Monday

Mmm-Mmm Mondays: Frosted Banana Bars

Whenever I get burned out on the domestic-baking side of my life, I go out in search of a fabulous blog with awesome new recipes to experiment with.  I was not disappointed when I found this little gem.  Send some blogging-love over to Kentucky Girl, because she's got some really good recipes you'll want to try.  I know I'll be making this one for my kids after-school snack today.

FROSTED BANANA BARS
(the following is for the actual bars. cream cheese frosting recipe will follow below)

1/2 cup butter, softened
1 1/2 cups white sugar 
2 eggs
1 cup sour cream
1 teaspoon vanilla extract
2 cups all purpose flour
1 teaspoon baking soda
1/4 teaspoon salt
1 cup mashed ripe bananas (which is roughly 2 large bananas)

1. Preheat oven to 350 degrees.
2. Grease a 10x15 inch jellyroll pan. (I wanted to save myself a bit of clean up time so I just lined my pan with aluminum foil and lightly sprayed it with cooking spray.)
3. In a large bowl, cream together the butter and sugar until smooth.
4. Beat in the eggs, one at a time.
5. Stir in the sour cream and vanilla.
6. In a separate bowl, combine the flour, baking soda and salt. Once combined stir this into the batter mixture.
7. Mix in the mashed bananas.
8. Spread evenly onto the prepared pan.
9. Bake for 20 to 25 minutes (at 350 degrees) or until a toothpick inserted into the center comes out clean. 
10. Allow bars to cool before frosting. 


CREAM CHEESE FROSTING

(the original recipe suggests using store bought frosting but I'm not a big fan of store bought frosting but you do have that option if you prefer it. You can use any cream cheese frosting recipe you have....below is the one I used.)

***This frosting is courtesy of one of the reviewers of the banana bars on allrecipes.com. Thanks Laura Jean for the suggestion!***


1 (8oz) block cream cheese, softened
2 cups powdered sugar
1 teaspoon vanilla
splash of milk (just enough to thin out the frosting)


1. In a large bowl, cream together the cream cheese and powdered sugar until smooth.
2. Mix in the vanilla.
3. Mix in a splash of milk (enough to just thin it out).
4. Frost the banana bars once they have cooled (again, frosting the bars is optional)


You can store these in the refrigerator and they're great cold!


Thanks again, Kentucky Girl, for sharing this delish recipe with us today. I mean, really. Who doesn't love the welcoming smell of homemade banana bread when you come in the door? 

Thursday

Making Memories: Recipe for Play-dough Day!


 Lately it seems like life is flying by so fast! I feel like I need to slow down and enjoy those little moments everyday with my children.  So I decided to make our Thursdays a Play-doh Day! We clean off the kitchen counter, gather ingredients, make homemade play-doh, then spend the next hour or so getting creative with our hands.  You'd be surprised at the age range of children (and adults) that can't resist a huge glob of the stuff.  

This recipe is quick and easy, and so fun to do with kids or grandkids!

What you need:   
2 1/2 cups of flour
1/2 cup salt (any kind will work)
2 envelopes Kool-aid (your choice of color)
3 T. oil
2 cups boiling water (if it isn't hot enough, the dough gets too sticky to work with)


Mix dry ingredients together in mixing bowl.

Add boiling water and oil. 

Mix together until dough pulls away from sides and forms a ball.


Put onto the counter and knead by hand until smooth.  My little guy is checking to see if it's cooled off enough to play with!

Is that easy or what?  Now get out those ingredients and make some memories!

Sunday

Mmm-Mmm Mondays: Back-to-School Breadsticks

  • My kiddos and I had so much fun making this recipe--and it was educational, too!  So easy with only 3 ingredients and keeps the kids busy for at least 30 minutes.  All I can say is it was worth the mess!
 Here is all you need for the fun to begin!
    • 1 Loaf RHODES Bread Dough, thawed but still cold
    • 1 egg, beaten or melted butter
    • coarse salt, sugar, sesame seeds, poppy seeds or parmesan cheese and garlic salt
With a knife or scissors, cut thawed loaves into 4 long strips.
 
 Roll each piece into a rope 1/2-inch in diameter and form letters by cutting and overlapping where necessary.  
 
Place letters on a sprayed baking sheet. Brush with egg or melted butter. Cover with sprayed plastic wrap.
Let rise 20-30 minutes. Sprinkle with coarse sugar ,seeds or parmesan cheese and garlic salt. Bake at
350 deg. F 20-25 minutes or until golden brown. 


Now wasn't that easy?  Not only did my preschooler get to practice his alphabet, but we also made some great memories that my children will never forget.

Saturday

Bald for Becky Cancer Fundraiser

This week I had the opportunity to be a part of  the. coolest. online auction.  

Bald for Becky is an organization built by loving friends and family to support a courageous woman in her fight against cancer. Becky, a 30 year old mother of 4, was diagnosed with sarcoma after a couple of months trying to find a diagnosis. The online auction was created by Becky's awesome fans to raise funds to help her in this battle of a lifetime. 

Dozens of crafters donated items to the cause, (we donated 2 ShadowCase Designer Kits), and the family was able to raise $1800 in only 3 days! If you would still like to donate, you can visit their Blog or Facebook page and donate via Paypal.


If you feel like you need to be inspired today, learn more about Becky and her journey on her facebook page The Veatches Beat Cancer or visit the Bald for Becky blog. I know that stumbling across her story by chance has changed my outlook on life and made me grateful every day for my blessings.


Have a wonderful weekend!

Friday

Life as Lou ShadowCase {Giveaway}

Well, as things would have it, this week has turned out to be a spontaneous Giveaway Party, so thank your lucky stars that you stopped by my blog! 
 
Leah at Life as Lou is giving away a ShadowCase Designer Kit of your choice this week, so hop on over to her blog and find out how you can enter to win!  Entries will be taken until September 16th.


This is going to be the last ShadowCase Giveaway in my giveaway tour-de-marketing of the last few months, so don't miss out!

Reminder:
You've got 2 chances to win with TidyMom's giveaway going until Sept. 14.  The winner will receive her own ShadowCase Designer Kit ($60).  Hop on over to TidyMom and take a look around.  Good luck to you all!

Tuesday

ShadowCase Review and {Giveaway}


Here is a great opportunity you don't want to miss this week! Cheryl over at TidyMom (if you don't already follow her blog, you should!) is running a ShadowCase Giveaway for all her readers this week.  Didn't she create a gorgeous piece of artwork with these little keepsakes and photo? If you've been thinking about getting a ShadowCase of your own, this is what Cheryl had to say about her ShadowCase design...


"I had so many ideas  as to how I could use my ShadowCase but I decided on displaying some heirlooms from my parent’s wedding, along with a childhood picture of me and my brother, and a few other family keepsakes. I also used my Silhouette SD to cut out a little vinyl to add the year my parents were married.

It’s fun looking at these items displayed together in such a unique way.  I’m thrilled with how it turned out.  The boxes are high quality and so well built I know they will stand the test of time!  ShadowCase makes it easy to turn your memories into artwork!"


It is so easy to enter the giveaway, and the winner will receive her own ShadowCase Designer Kit ($60).  Hop on over to TidyMom and take a look around.  Good luck to you all!

Thursday

Candle Makeover


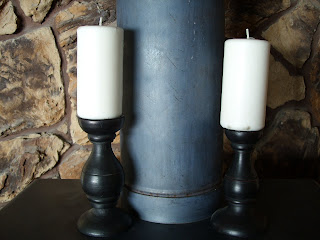
I have had these candles in my family room for several years, and they are showing all the wear and tear from stray footballs knocking them down, dogs trying to eat them, and rambunctious children teetering them over. So I thought they would enjoy an hour in my craft room, getting a new makeover.  

It's so simple, I'll probably do this with every candle in my home!!

Pick your favorite scrapbook paper that you want to decorate with.  I chose a ColorBok paper pack from Walmart for $5.
Cut the paper to the width you prefer, and ink the edges to give it a more finished look.

Glue the paper to the candle with a hot glue gun.

Add any embellishment tag you would like--this one came with the ColorBok Paper Pack. I inked it and threaded a piece of ribbon through the back.

Voila!! In only a few minutes, you have given new life to not only the candles, but to the entire room!

Wednesday

{An Emotional Week} MockingJay and Sweet Tiny Sparrows

This past week has been emotional and stressful for me--hence the absence from blogging as I try to get a grip on myself. Yesterday I sat and read MockingJay by the bedside of a dear friend who is in the battle of her life against cancer.  Young and newly married, she is trying to stay strong for us all. 

I was thrilled to hear that she has been waiting for this 3rd book in the Hunger Games trilogy.  Though her vision is poor, and she can't see right now, I was able to read it aloud so we could both lose ourselves in the life of Katniss Everdeen.  Those few hours have changed my life for the better. What an honor to be near my sweet friend, and what an example she is to me!!
 -----------------------------------------------------------------------------------------------------
One of the newest Tiny Sparrow sweethearts--meet Danica!!
I am also honored to be involved with a truly remarkable non-profit organization called the Tiny Sparrow Foundation.  I was contacted by them about a month ago when they asked if I would donate some ShadowCases for a fundraising auction they are having on September 30 in Texas. They are a non-profit organization dedicated to providing lasting memories through the beautiful art of photography to the families with children who are facing life threatening illnesses.  With the help of photographers worldwide, they are able to give a beautiful album that will carry the love, joy and everlasting memory of each individual family.  It is just amazing what this organization does for families and children!! 


A glimpse of one of our new StoryBoards in the French Country Ivory ShadowCase that I sent along for the Fundraising Auction.  Isn't it adorable??
I am soooo excited to participate in the True Rumors Fundraising Auction to be held on Sept. 30.  Several of our ShadowCases will be on display to be auctioned, and all proceeds will go to the Tiny Sparrow Foundation. 

For more information on this amazing foundation, visit Tiny Sparrow on Facebook and meet some of the angel children who have been blessed by the love of Tiny Sparrow and those wonderful people that work hard to make their dreams a reality.